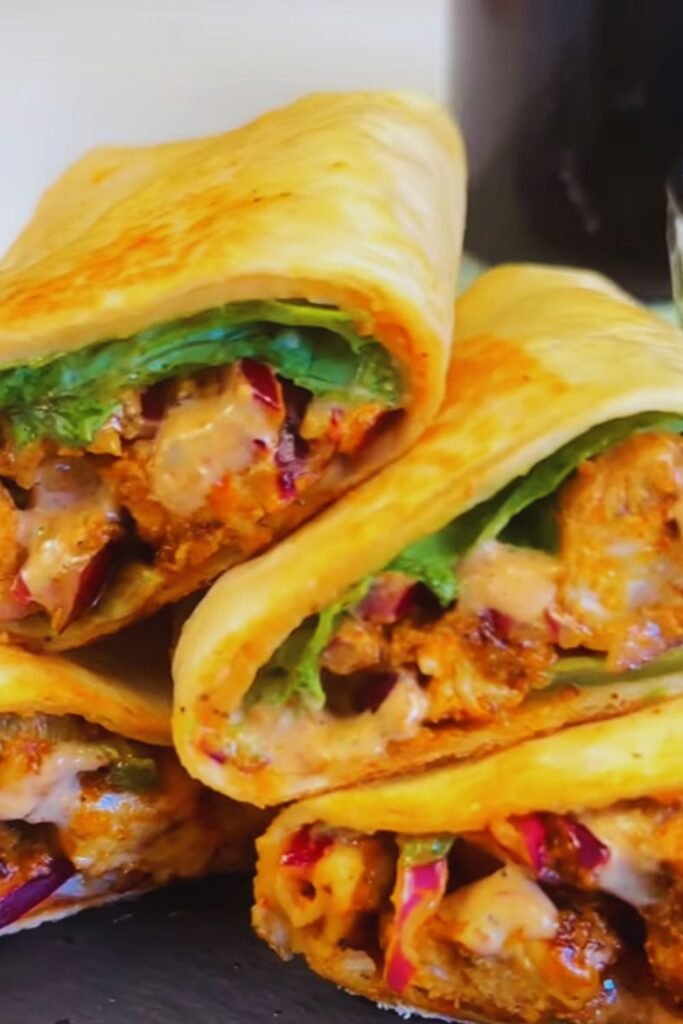
There’s something magical about the combination of tender chicken, melted cheese, and aromatic garlic all wrapped up in a warm tortilla. As someone who’s constantly juggling work, family, and social commitments, I’ve come to appreciate recipes that deliver maximum flavor with minimal effort. These Cheesy Garlic Chicken Wraps have become my go-to solution for busy weeknights, impromptu gatherings, and those times when the hunger pangs strike unexpectedly.
I discovered this recipe during a particularly hectic week when takeout was becoming an expensive habit. Looking through my refrigerator, I found some leftover grilled chicken, cheese, and tortillas. With a few cloves of garlic and basic pantry staples, I created what would become a family favorite. The beautiful thing about these wraps is their versatility – they can be customized based on what you have on hand, making them perfect for using up leftovers creatively.
Whether you’re a seasoned cook or just starting your culinary journey, these wraps strike the perfect balance between simplicity and satisfaction. The garlic-infused chicken pairs beautifully with gooey cheese, while fresh vegetables add texture and nutritional value. Follow along as I share my perfected recipe along with tips and tricks I’ve gathered through countless preparations.
The Secret to Perfect Cheesy Garlic Chicken Wraps
Before diving into the recipe, let’s talk about what makes these wraps special. The magic lies in three key elements:
- Properly seasoned chicken: The garlic should permeate the chicken without overwhelming it
- The right cheese blend: A combination of meltable and flavorful cheeses creates the perfect texture
- Proper wrapping technique: A well-wrapped tortilla means no filling escapes during cooking
Now, let’s gather our ingredients and create a delicious meal that will have everyone asking for seconds!
Ingredients You’ll Need
For 4 wraps:
- 2 cups cooked chicken, shredded or diced (rotisserie chicken works wonderfully)
- 4 large flour tortillas (10-inch size works best)
- 4 cloves garlic, minced
- 2 tablespoons olive oil
- 1 cup shredded mozzarella cheese
- 1 cup shredded cheddar cheese
- 1/4 cup cream cheese, softened
- 1/2 red bell pepper, thinly sliced
- 1/2 cup baby spinach leaves
- 2 green onions, finely chopped
- 1 teaspoon Italian seasoning
- 1/2 teaspoon paprika
- 1/4 teaspoon crushed red pepper flakes (optional, for heat)
- Salt and black pepper to taste
- 2 tablespoons butter, for toasting wraps
Optional Add-ins:
- Sliced avocado
- Diced tomatoes
- Sautéed mushrooms
- Caramelized onions
- Fresh herbs like cilantro or parsley
Equipment Needed:
- Large skillet
- Mixing bowl
- Cutting board
- Sharp knife
- Measuring cups and spoons
- Cheese grater (if not using pre-shredded cheese)
- Spatula
- Tongs
Step-by-Step Instructions
Preparing the Garlic Chicken Filling
- Heat olive oil in a large skillet over medium heat
- Add minced garlic and sauté for 30-45 seconds until fragrant but not browned (browned garlic can become bitter)
- Add the cooked chicken to the skillet
- Sprinkle with Italian seasoning, paprika, salt, and pepper
- Cook for 3-4 minutes, stirring occasionally to ensure the chicken absorbs the garlic flavor
- If using red pepper flakes, add them now and stir to incorporate
- Remove the skillet from heat and set aside
Preparing the Cheese Mixture
- In a mixing bowl, combine the softened cream cheese, 3/4 cup of the mozzarella, and 3/4 cup of the cheddar
- Add half of the chopped green onions to the cheese mixture
- Stir until well combined
Assembling the Wraps
- Lay a tortilla flat on a clean surface
- Spread about 2 tablespoons of the cheese mixture evenly across the center of the tortilla
- Add approximately 1/2 cup of the garlic chicken mixture on top of the cheese
- Arrange a few slices of bell pepper and a small handful of spinach leaves on top of the chicken
- Sprinkle with additional shredded cheese, reserving some for later
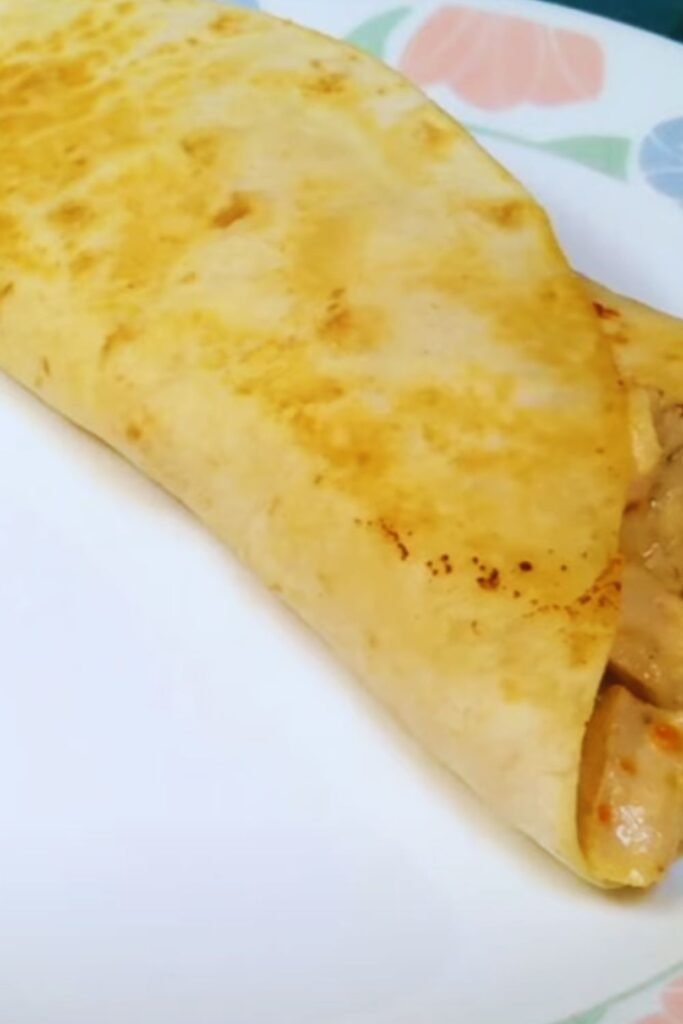
- Fold in the sides of the tortilla, then roll it up tightly, tucking in the edges as you go
- Repeat with the remaining tortillas and filling
Toasting the Wraps to Perfection
- Wipe the skillet clean and return it to medium heat
- Add 1/2 tablespoon of butter to the skillet
- Once the butter has melted, place 1-2 wraps (seam side down) in the skillet
- Cook for 2-3 minutes until golden brown, then flip
- Cook for another 2-3 minutes until the second side is golden and the cheese inside has melted
- Remove to a plate and repeat with remaining wraps, adding more butter as needed
Pro Tip:
For extra crispy wraps, brush the outside of the tortilla with a thin layer of butter before placing it in the skillet.
Nutritional Information
Here’s a breakdown of the nutritional content per wrap:
| Nutrient | Amount | % Daily Value* |
|---|---|---|
| Calories | 520 | – |
| Total Fat | 28g | 36% |
| Saturated Fat | 14g | 70% |
| Cholesterol | 95mg | 32% |
| Sodium | 820mg | 36% |
| Total Carbohydrate | 35g | 13% |
| Dietary Fiber | 2g | 7% |
| Sugars | 2g | – |
| Protein | 32g | 64% |
| Calcium | 350mg | 27% |
| Iron | 2.5mg | 14% |
| Potassium | 320mg | 7% |
| Vitamin A | 1500IU | 30% |
| Vitamin C | 25mg | 28% |
*Based on a 2,000 calorie diet
Variations to Try
One of the reasons I love this recipe is its flexibility. Here are some delicious variations I’ve tried over the years:
Mediterranean Style
- Add olives, feta cheese, and diced cucumber
- Replace Italian seasoning with oregano
- Add a squeeze of lemon juice to the chicken
- Serve with tzatziki sauce for dipping
Southwest Flavor
- Use pepper jack cheese instead of mozzarella
- Add black beans and corn
- Season chicken with cumin and chili powder
- Include fresh cilantro and lime juice
- Serve with salsa and guacamole
Buffalo Chicken
- Toss the chicken with buffalo sauce
- Use blue cheese or ranch dressing instead of cream cheese
- Add celery for crunch
- Serve with extra buffalo sauce for dipping
Vegetarian Option
- Replace chicken with sautéed portobello mushrooms or chickpeas
- Add more vegetables like zucchini and yellow squash
- Use smoked provolone for depth of flavor
Make-Ahead and Storage Tips
I often prepare elements of this dish in advance to make weeknight cooking even faster:
Prep Ahead:
- Cook and season the chicken up to 3 days in advance
- Chop vegetables and store in airtight containers
- Mix the cheese blend and refrigerate
Storage:
- Assembled but uncooked wraps can be refrigerated for up to 24 hours (wrap tightly in plastic wrap)
- Cooked wraps will keep in the refrigerator for 2-3 days
- To reheat, warm in a skillet over medium-low heat for 2-3 minutes per side, or microwave for 1-2 minutes (though the tortilla won’t be as crispy)
Freezing:
- Freeze assembled uncooked wraps for up to 1 month
- Wrap each individually in parchment paper, then aluminum foil
- Thaw in the refrigerator overnight before cooking
- Add 1-2 minutes to the cooking time if still cold from the refrigerator
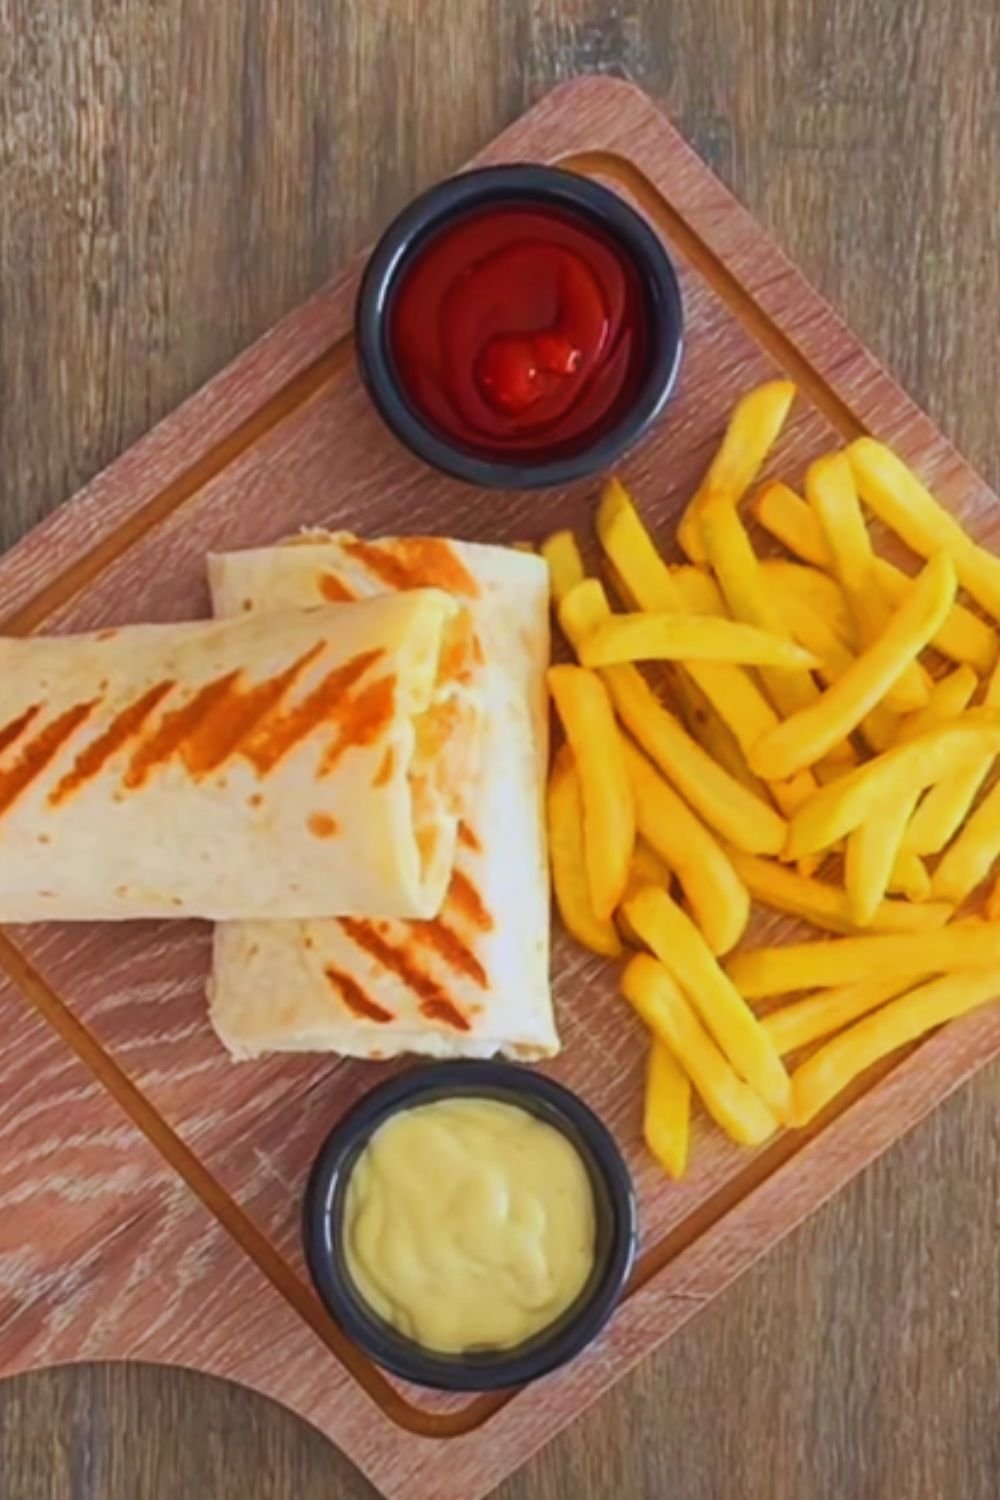
Serving Suggestions
These wraps are fantastic on their own, but I often pair them with complementary sides for a complete meal:
- Fresh green salad with a light vinaigrette
- Roasted vegetable soup
- Sweet potato fries
- Cucumber and tomato salad
- Fresh fruit
- Greek yogurt with honey (balances the savory flavors)
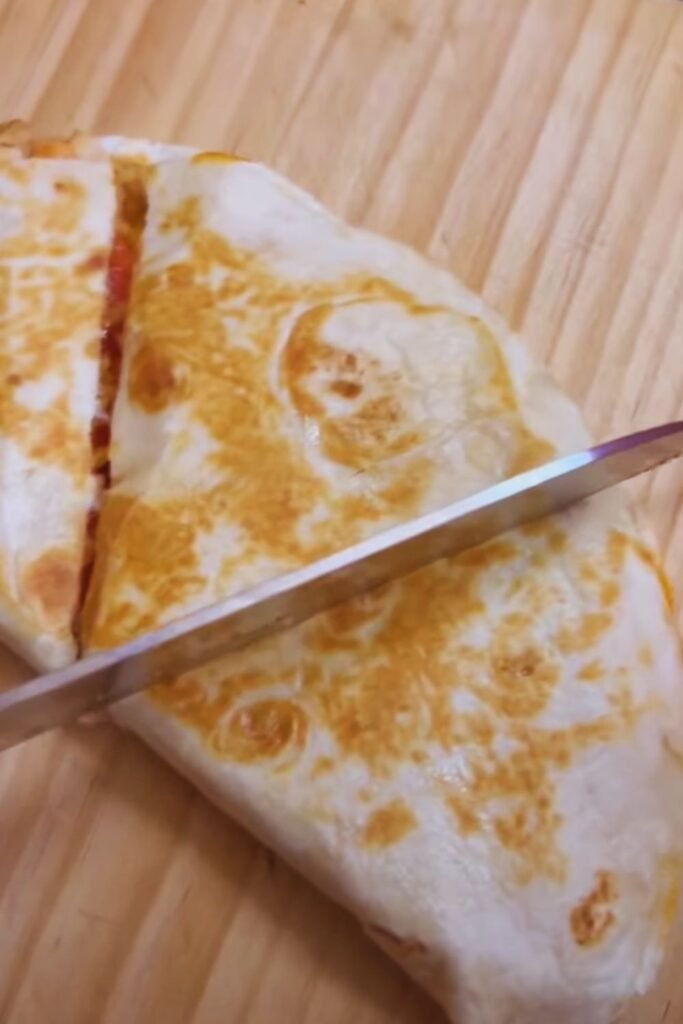
For a casual gathering, I like to cut the wraps into pinwheels and serve them as appetizers alongside a variety of dipping sauces like:
- Ranch dressing
- Chipotle mayo
- Avocado crema
- Garlic aioli
- Marinara sauce
Troubleshooting Common Issues
Even the most straightforward recipes can sometimes present challenges. Here are solutions to common problems:
Problem: Tortilla tears while rolling
Solution: Don’t overfill the wrap, and warm the tortilla for 10-15 seconds in the microwave before filling to make it more pliable.
Problem: Filling falls out during cooking
Solution: Make sure to tuck the sides in tightly before rolling and place the wrap seam-side down in the pan first.
Problem: Cheese oozes out and burns
Solution: Don’t place cheese too close to the edges, and moderate your heat – medium-low is often better than medium.
Problem: Wraps are soggy instead of crispy
Solution: Make sure your filling isn’t too wet (drain any excess liquid from vegetables), and cook on a higher heat for a shorter time.
Problem: Garlic burns and tastes bitter
Solution: Always sauté garlic briefly just until fragrant before adding other ingredients.
Why This Recipe Works
As I’ve perfected this recipe over time, I’ve come to understand the food science that makes it so successful:
- Layering flavors: By infusing the oil with garlic before adding chicken, we create a base layer of flavor that permeates the entire dish.
- Cheese combination: Using three types of cheese creates the perfect balance – cream cheese for creaminess, cheddar for sharp flavor, and mozzarella for that Instagram-worthy cheese pull.
- Contrasting textures: The crispy tortilla, tender chicken, melty cheese, and fresh vegetables create a satisfying mouthfeel with every bite.
- Balanced nutrition: Protein from the chicken, calcium from the cheese, and vitamins from the vegetables make this a complete meal.

Frequently Asked Questions
Q: Can I use corn tortillas instead of flour tortillas?
A: While possible, corn tortillas are smaller and more prone to cracking. If using corn tortillas, I recommend using two per wrap, overlapping slightly, and ensuring they’re very fresh or warmed properly to improve flexibility.
Q: How can I make this recipe gluten-free?
A: Simply substitute gluten-free tortillas for regular flour tortillas. Everything else in the recipe is naturally gluten-free, but always check packaged ingredients for hidden gluten.
Q: Can I use raw chicken instead of pre-cooked?
A: Yes, but you’ll need to fully cook the chicken first. Dice it into small pieces, season with salt and pepper, and cook thoroughly before proceeding with the garlic sautéing step. This will add about 8-10 minutes to your preparation time.
Q: Is there a way to reduce the calories in this recipe?
A: Absolutely! Use low-fat cheese varieties, increase the vegetable content, use smaller tortillas, or try a lettuce wrap instead of a tortilla. You can also use cooking spray instead of butter for toasting.
Q: How spicy is this recipe?
A: As written, it has a very mild flavor profile. The red pepper flakes are optional and can be adjusted to your heat preference. You can also add hot sauce or diced jalapeños for extra kick.
Q: What’s the best way to serve these for a party?
A: I recommend making the wraps slightly smaller, cutting them into halves or thirds, and serving them on a platter with toothpicks for easy grabbing. Have a variety of dipping sauces available for guests to customize their experience.
Q: Can I make these in the oven instead of stovetop?
A: Yes! Assemble the wraps, place them seam-side down on a baking sheet, brush with melted butter, and bake at 375°F (190°C) for 10-12 minutes until golden and crispy.
Q: What can I substitute for cream cheese?
A: Greek yogurt, ricotta cheese, or mascarpone can work as alternatives. Each will alter the flavor profile slightly but will still provide the creamy element that brings the filling together.
Final Thoughts
These Cheesy Garlic Chicken Wraps have saved me from the “what’s for dinner” dilemma countless times. They’ve been a hit at family gatherings, potlucks, and late-night snack sessions. The beauty of this recipe is that it can evolve with your tastes and what’s available in your pantry.
I encourage you to use this recipe as a starting point and make it your own. Perhaps you’ll discover a new favorite variation or ingredient combination that works perfectly for your palate. Cooking should be an adventure, and even simple recipes like this one can bring joy and satisfaction to your table.
Remember that the best meals often come from necessity and creativity rather than rigid rules. So the next time you’re staring into your refrigerator wondering what to make, consider these wraps – they might just become your new go-to recipe too!
What’s your favorite wrap combination? I’d love to hear how you’ve adapted this recipe to make it your own special creation!